Step 1 - Go to SSL in the control panel
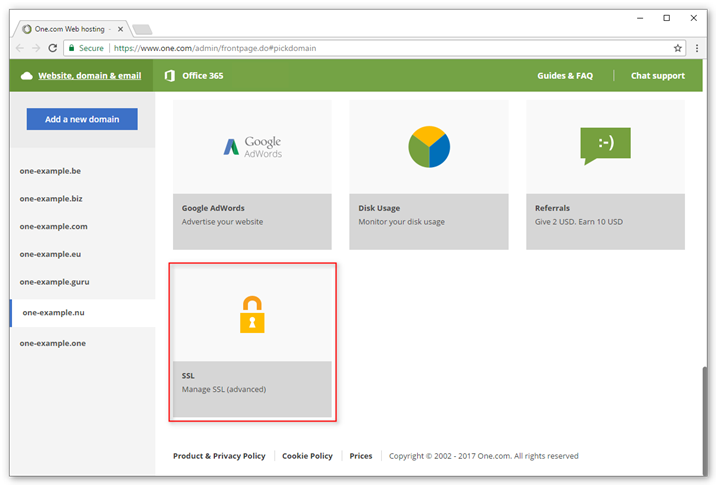
Log in to the One.com control panel, scroll down and click SSL.

Step 2 - Activate SSL
- Select On.
- Read the terms of business and check the box to accept.
- Click Save.

Note: It takes up to 90 minutes for the SSL certificate to be installed and ready on your domain.
Step 3 - Go to File Manager in the control panel
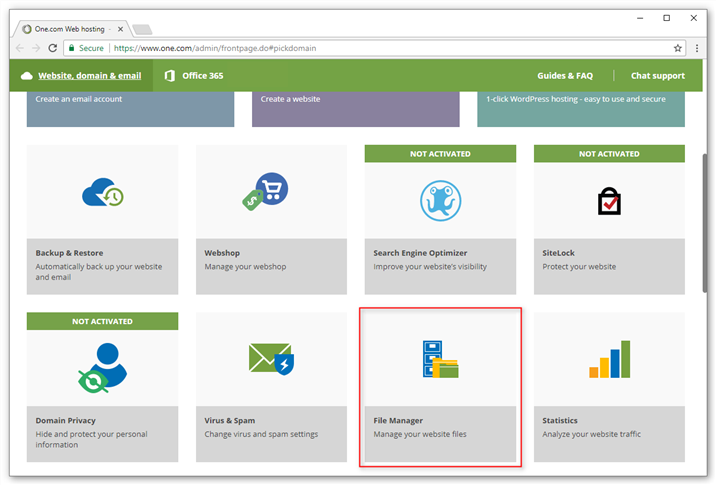
Open File Manager in the One.com control panel.

Step 4 - Create an .htaccess file
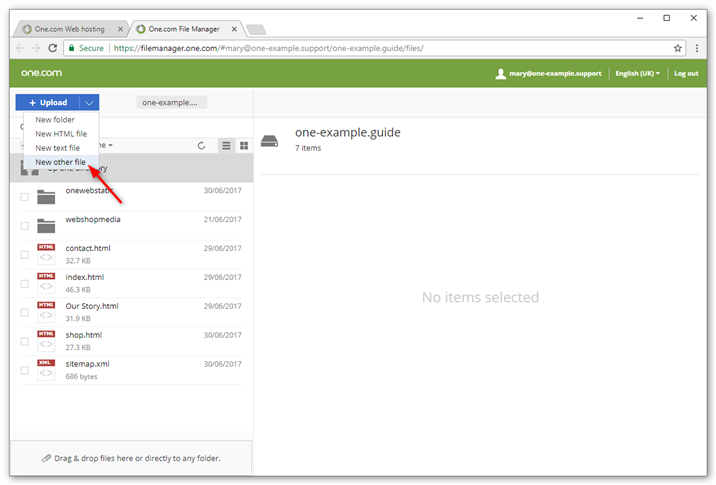
- Click the arrow at the right of the blue button and select New other file.
- Name the file .htaccess, beginning with a dot.
Note: If you already have an existing .htaccess file on your web space, you don't need to create a new file. Instead you can edit the existing file.

Step 5 - Edit the .htaccess file
Select the .htaccess file and click Edit at the top of your screen to open the text editor.

Step 6 - Paste in the code
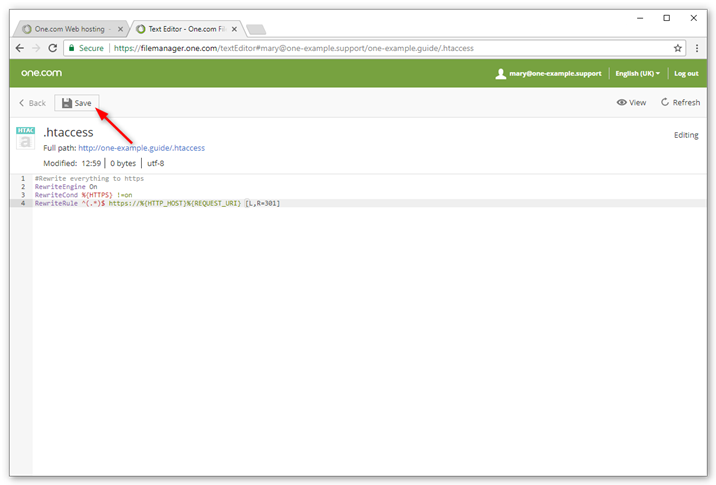
Paste the following code in the text editor, and click Save at the top of your screen.
#Rewrite everything to https RewriteEngine On RewriteCond %{HTTPS} !=on RewriteRule ^(.*)$ https://%{HTTP_HOST}%{REQUEST_URI} [L,R=301]

Step 7 - Done!
All done! Open your site in your browser and check if you see the green secure lock.


